
Painting kitchen cabinets Beds Bucks Herts Northamptonshire
Upcycling Laminate and Vinyl Wrapped Kitchens: A Transformation Guide
In recent years, upcycling laminate and also vinyl wrapped kitchens has gained popularity. Let’s debunk the misconceptions and delve into the possibilities:
- The Misconception:
- Many believe it’s impossible or not durable enough to upcycle laminate or vinyl wrapped kitchens.
- But the truth is, it’s entirely feasible!
- The Upcycling Process:
- Upcycling involves repurposing existing materials into something new.
- Interior designers and also specialist cabinet painters have embraced this trend.
- Choosing the Right Primer:
- I assess each project individually.
- For tricky surfaces like laminate or vinyl, I use either Shellac or oil-based adhesion primers.
- These primers create a strong bond, ensuring durability.
- Surface Preparation Matters:
- A thorough initial clean-down removes surface residues (oils, food, etc.).
- This allows the adhesion primer to grip effectively.
- Topcoats and Transformation:
- Once primed, we apply topcoats.
- The result? A beautifully transformed kitchen!
So, whether in Beds, Bucks, Herts, or Northamptonshire, let’s upcycle your kitchen into something remarkable!
These are a few examples of vinyl, laminate or wooden doors that can be painted.
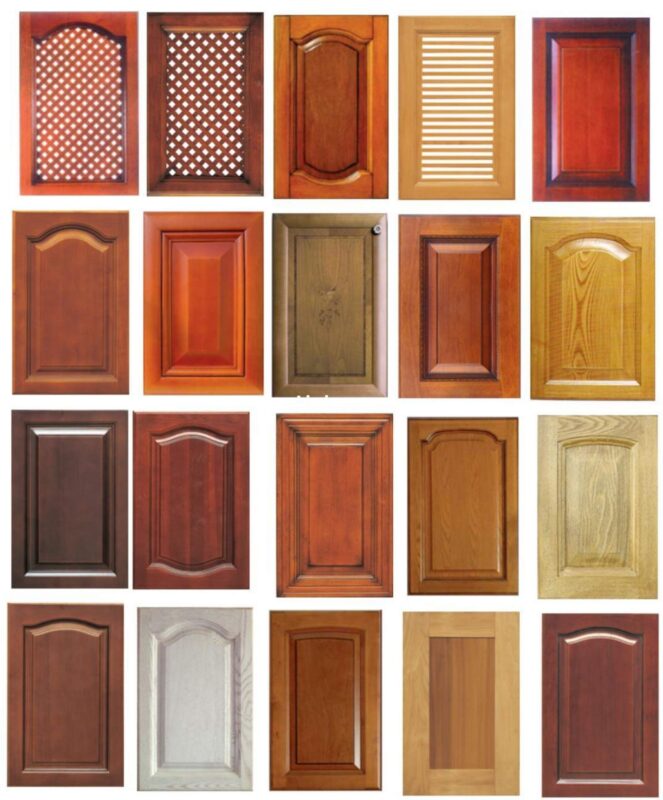
Upcycling laminate or vinyl-wrapped kitchens is a fantastic way to breathe new life into dated spaces. Here’s a step-by-step guide to get you started if you are a doing it yourself:
- Assess the Kitchen:
- Laminate and also vinyl kitchens are often solid and suitable for painting.
- Check for any damage, ensuring the vinyl hasn’t come away from the doors.
- Surface Preparation:
- Clean the kitchen thoroughly using a suitable degreaser.
- Sand the surfaces lightly to create a good base for paint adhesion.
- Choosing the Right Primer:
- Select an appropriate primer—either Shellac or oil-based—for excellent adhesion.
- The right primer ensures a lasting finish.
- Topcoat Selection:
- Decide on the finish you want—satin, matte, or glossy.
- Use topcoat paints designed for kitchen cabinets.
- Protection and Details:
- Use masking tapes, lining, and also protective materials to safeguard surrounding areas.
- Consider updating handles or choosing new ones for a fresh look.
- Explore new worktops or refinish existing wooden ones.
- Sanding and Cleaning:
- Use the right grades of abrasive for sanding between coats.
- Tack rags and cleaning cloths help maintain a clean surface.
- Paint Extenders and Diluents:
- These additives can enhance the paint application process.
Remember, attention to detail and proper execution are key. Enjoy transforming your kitchen!
Essential kit
Having the right tools and following professional practices is crucial for achieving a lasting finish. Let’s break down the essentials:
- Professional Kit:
- A well-equipped kit ensures quality work.
- Beware of so-called painters with inadequate tools—results may disappoint.
- Protection Matters:
- Protecting surrounding areas during painting is essential.
- Neglecting this step can leave kitchens in a terrible state.
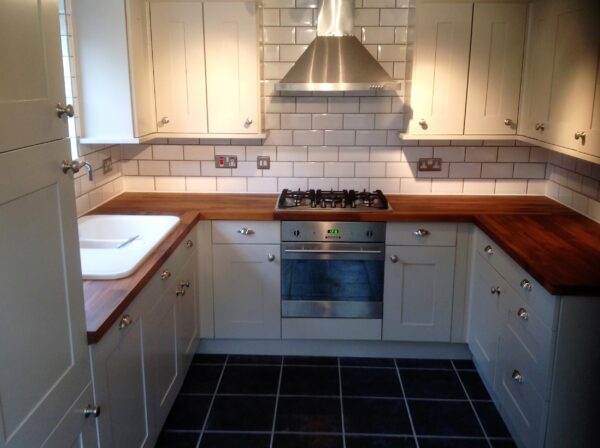
- Case Study: Vinyl Wrap Kitchen Upcycle:
- This small kitchen had vinyl wrap doors.
- Doors were removed and finished in the workshop.
- Tops were re-oiled, new knobs fitted, and a tiler added fresh tiles.
- The results? Fantastic! An effective upcycle without breaking the bank.
- The kitchen remained usable during the painting process.

Achieving a Lasting Finish: The Essentials for Professional Kitchen Cabinet Painting
When it comes to professional kitchen cabinet painting, attention to detail and having the right tools are crucial. If you follow this list, you’re well on your way to achieving a durable finish. Beware of so-called cabinet painters who show up ill-equipped—many kitchens have suffered due to lack of proper care and protection.
Let’s take a look at a recent project: a relatively small kitchen with vinyl wrap doors. First, the doors were removed and meticulously finished in my workshop. Next, the countertops received a fresh oil treatment, and also new knobs were fitted upon completion. A skilled tiler added new tiles to the upstand and backsplash area. The results speak for themselves—a fantastic transformation that didn’t break the bank. And the best part? The kitchen remained functional throughout the entire painting process.
Painting kitchen cabinets Beds Bucks Herts Northamptonshire
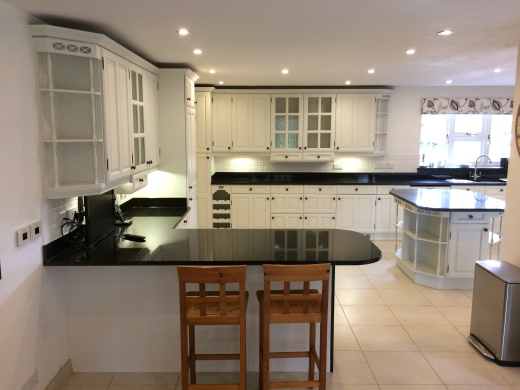
The photo above is a wooden kitchen that had taken a very orange look about it. The kitchen was prepared and again the results speak for themselves.
Endless choices
Transforming Your Kitchen: Endless Choices
When undertaking a project like this, the options are limitless. From paint colors and knobs to countertops, new tiling, and flooring, you have the power to make your kitchen look fantastic once again. Taking it a step further, consider investing in a new sink and oven to truly complete the look.
Perhaps you’re wondering whether the paint can withstand the rigours of everyday kitchen life. Rest assured, the products I use have been tried and tested. The level of finish is unparalleled, also no unsightly brush marks in sight!
A recent client was convinced that I had sprayed the doors. Interestingly, although I offer that service, I had actually brushed everything. This gives you an idea of the quality you can expect when I paint your kitchen.
For a no-obligation quote, feel free to contact me. The best way is to send images along with your address and email via WhatsApp at 07973 343252.
Painting kitchen cabinets Beds Bucks Herts Northamptonshire
Contact 